Fiona Walsh shares her top tips for improving your PowerPoint delivery using Presenter View
How confident are you when you present with PowerPoint?
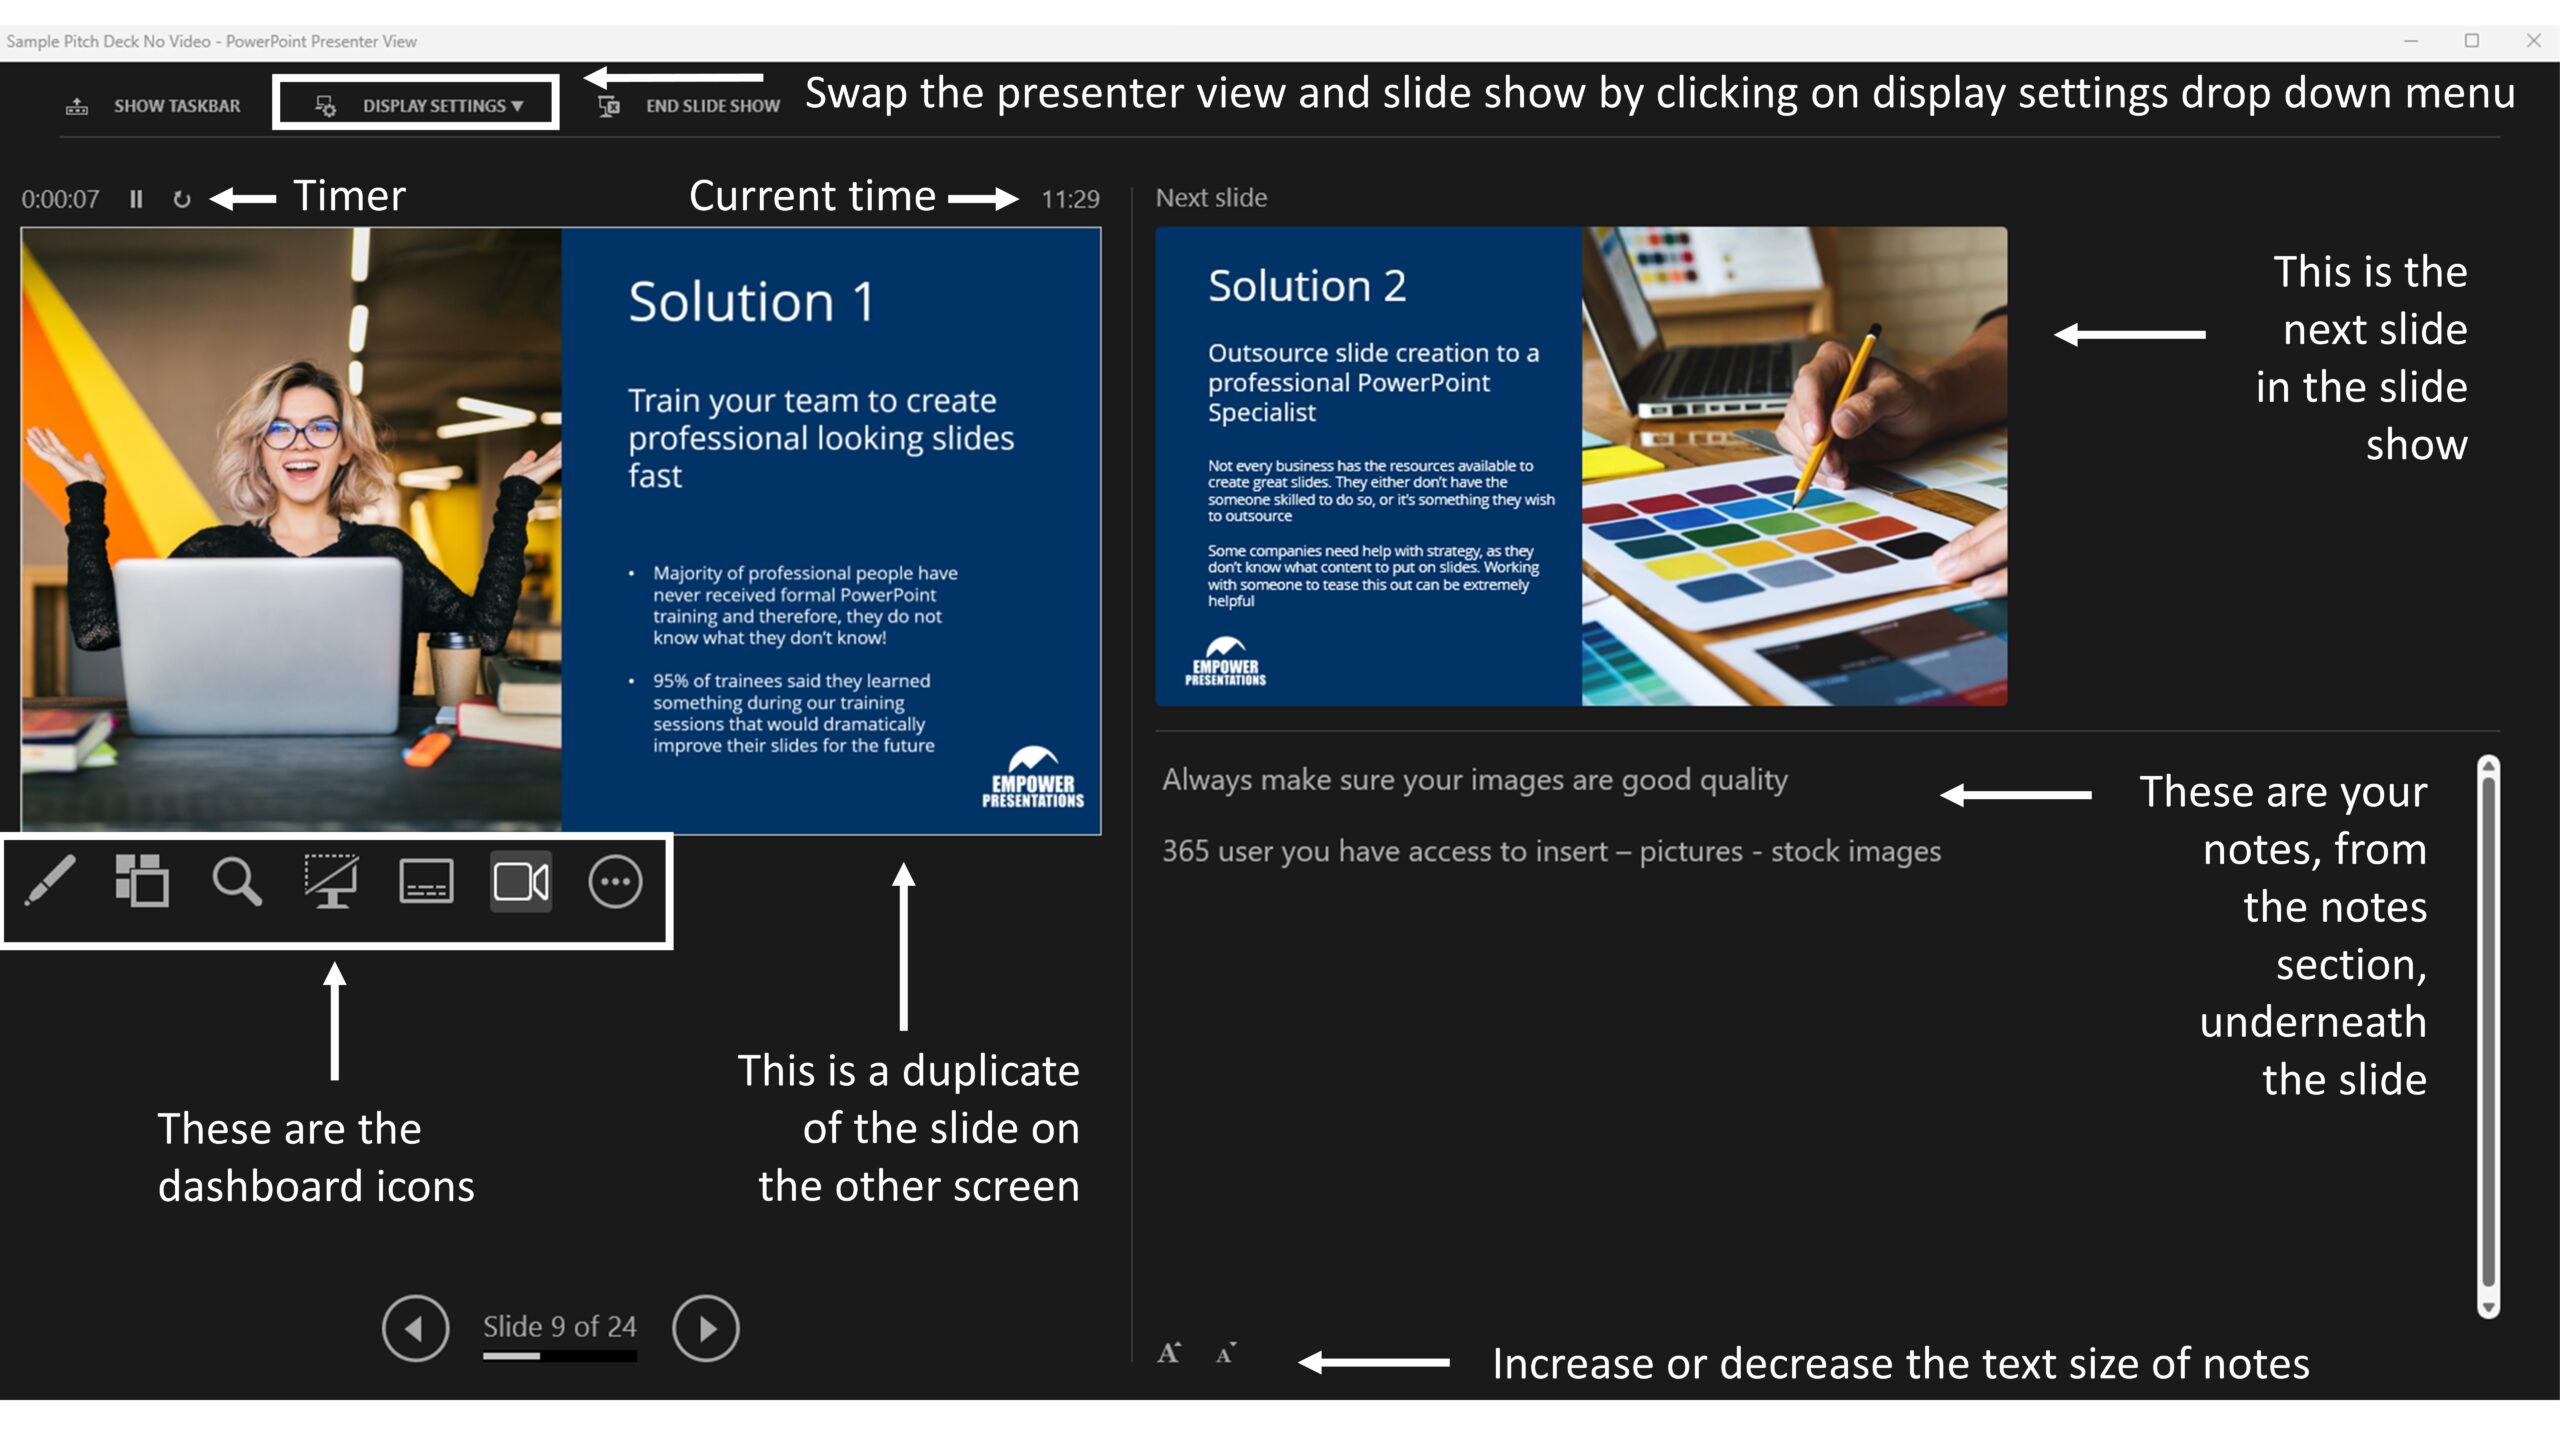
This article will explore tools available to help you confidently present with PowerPoint, including Presenter View’s hidden gems.
What Is Presenter View?
Presenter View is a presenting dashboard and is only available when you have a second screen connected to your laptop. It can be a desktop monitor or a screen in a meeting room or conference room. You must enable the Use Presenter View tick box on the Slide Show tab to use Presenter View.

This tick box is greyed out if you don’t have a second screen connected to your PC. You can choose which screen you want the Presenter View to be displayed on. Usually, this will be on your laptop.
Starting the Slide Show
When you start the slide show, Presenter View will open on one screen and the slide show will open on the other. A quick way to start the slide show is to press F5 on your keyboard. The show will start from the first slide. If you press shift + F5, the slide show will start from the current slide.
If Presenter View and the slide show are on the wrong screens, you can swap them around using the display setting drop-down menu on the top left of the Presenter View screen.

If you need to see something else on your PC, click on Show Taskbar. You can also end the show by clicking on the End Slide Show button.
You can navigate through your slides using the forward and back arrows at the bottom left of the Presenter View screen. Here you can see what slide you are on (e.g., slide 20 of 21).


Adding Notes
Presenter View allows you to see any notes you have added to the notes section of your slides. You can add notes from the Normal, Outline and Notes Page views. If you’ve forgotten to add something, you can edit the notes in Presenter View; pretty cool, eh?
By clicking on the large and small A icons at the bottom and centre of the Presenter View screen, you can change the text size of your notes.

Timings
You can see the time at the top and centre of the Presenter View screen, which is handy if you need to finish at a specific time. You also have a timer to keep on track if you have limited time to present. The timer can be paused or reset if needed.

Next Slide
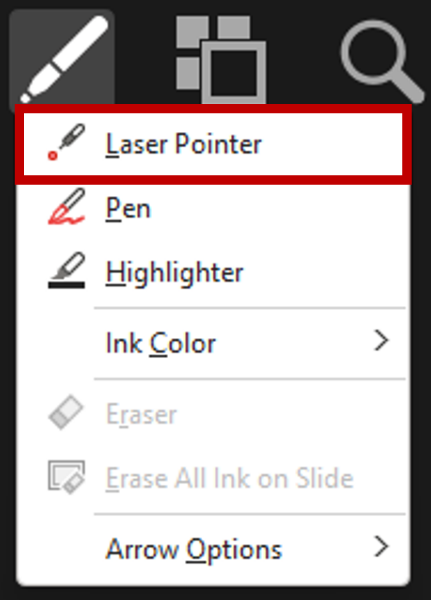
You can see the next slide in your presentation, or if you’re using animation, it will show the current slide with the following animation included (refer to Figure 1). You can use a digital laser pointer by clicking on the Pen button and then choosing Laser Pointer from the drop-down menu. Move your mouse over the slide in Presenter View, and your audience will see the laser pointer on the screen.
Annotate, Draw or Write
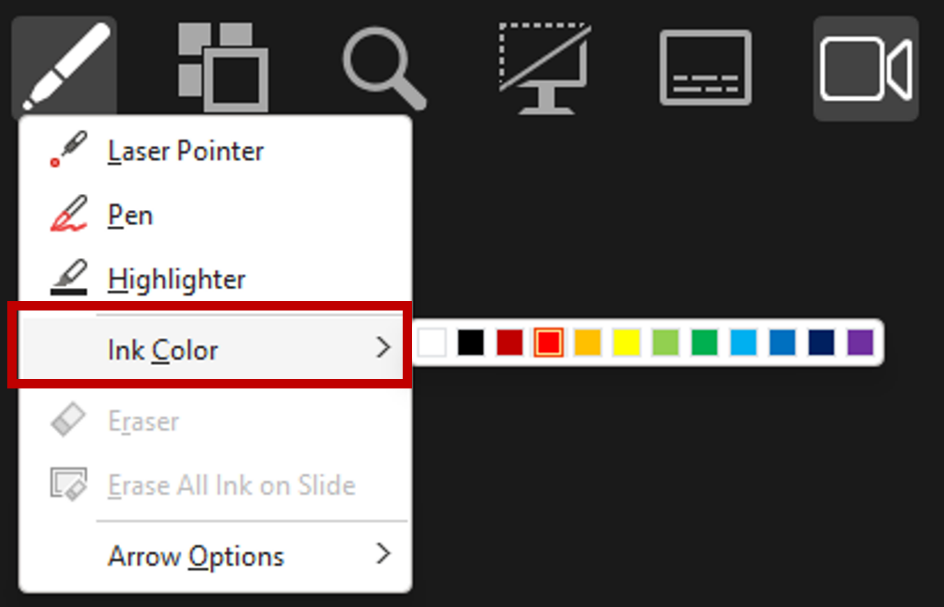
You can also annotate, draw or write on a slide from Presenter View. Click on the Pen button and choose either the Pen or the Highlighter option from the drop-down menu. You can change the colour of the pen or highlighter by clicking on the Ink Color arrow. An engaging way to use annotation during a presentation is to complete the final part of a graph or chart by asking your audience what they think the value is and then showing them by drawing it.
Zoom In
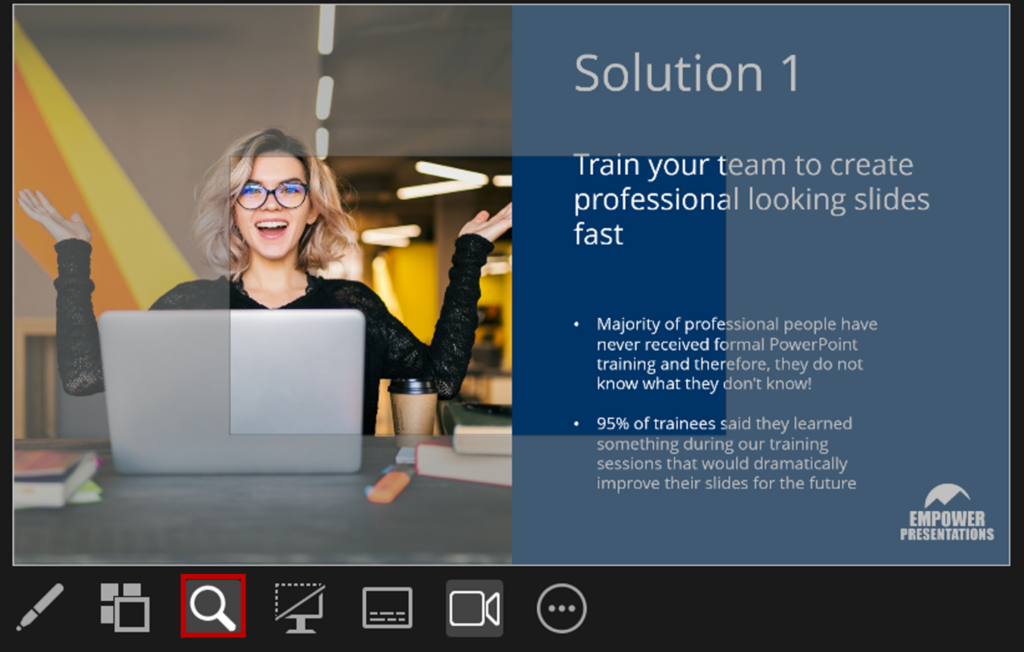
If you have a slide with detailed information, like a technical drawing or infographic, you can zoom into the slide while you’re presenting. Click on the Zoom button, then hover your mouse over the slide in Presenter View. A transparent rectangle will be visible with a greyed-out background. The transparent area represents where we will zoom in. Click again to zoom. Use the hand grabber to move around the zoomed-in slide.
Stop Sharing Slides
If you want to stop sharing your slides and bring attention back to you, click on the Screen button. Your screen will become black – but don’t worry; the Presenter View will still be on your laptop. Alternatively, you can press B on your keyboard to black the screen. Press B again to bring back the slideshow. Pressing W on the keyboard will do the same thing, only it will display a white screen. Again, press W to get back to the slide show.

Live Subtitles
The Subtitle button allows you to display live subtitles in the slide show as you speak. Subtitles can be shown above or below the slide or as an overlay at the top or bottom of the slide.

Here is a view of a slide with subtitles.

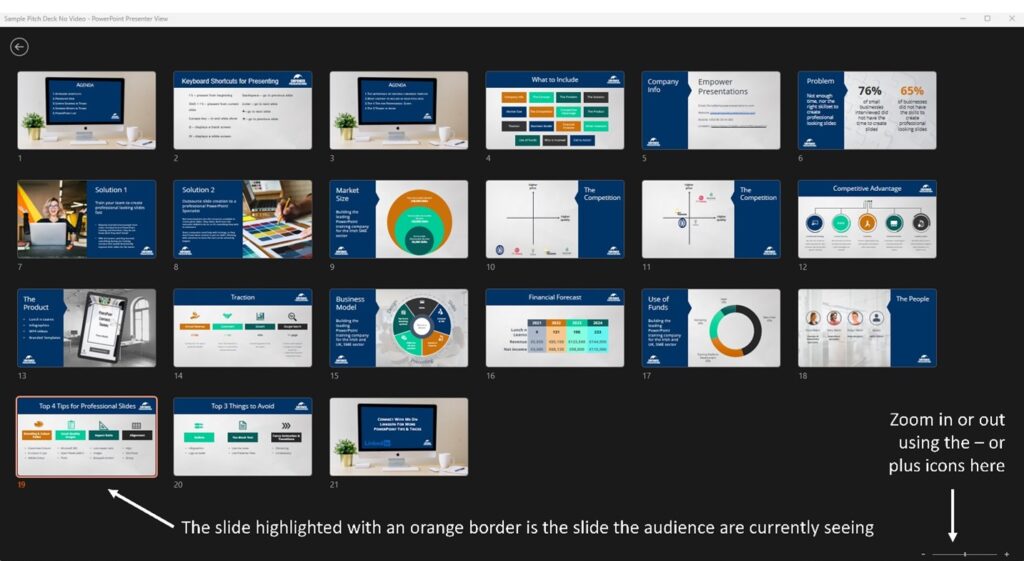
See All Slides
Finally, my favourite feature in Presenter View is See All Slides. When you click on this button, you see an overview of all the slides in your presentation.

You can navigate to any slide in the deck without showing the slides in between to the audience.
Imagine you have finished your presentation and someone asks to see a slide near the beginning. You don’t have to flick through every slide; you can use this view to navigate straight to the slide they want to see.
Or, if you’re running out of time, you could leave out a few slides without your audience knowing, and that way, you’ll stay within your allocated time.
How does it work?
A new window opens when you click on the See All Slides button. The slide highlighted in orange is the one your audience sees. Click on any other slide to take your audience straight to that slide. If you cannot see all the slides, you can zoom in or out by clicking the – or + buttons at the bottom right of the view.
Adopting these tools will allow you to present both confidently and professionally.
My final tip is to practice, practice, practice before your next big presentation!