
Lizebeth Koloko-Green takes us through Microsoft Power Automate, the hidden gem of Microsoft 365
Like many of you, I have been working from home for nearly a year, which I rarely did before this pandemic. In the beginning, I felt overwhelmed because I had just started a new job, I was home-schooling my eight-year-old daughter, had been sick for a few weeks and was launching my training company. It was a bit too much.
I wanted to find ways to be more productive, efficient and to optimize my precious time. My goals were not to work less but to work better, be more efficient, and devote myself to the essential things that interested me.
I had tried to optimize my time management using Microsoft Outlook to create tasks, set up rules, and quickly organize my emails. I was also using Microsoft OneNote and Microsoft To-do for my task management. However, I realized that an automation process was the key to making my life easier. I discovered Power Automate (used to be called Microsoft Flow), which is part of my Microsoft 365 subscription.
What is Power Automate?
Microsoft defines Power Automate as “a service that helps you create automated workflows between your favorite apps and services to synchronize files, get notifications, collect data, and more.”
The automation process can seem confusing, but at the bottom of the official Microsoft page you will find some Power Automate templates ready to use with just a click of a button. Be curious and check them out. There are thousands of prebuilt templates which will enable you to start automating everyday business processes immediately. You can customize these templates according to your business needs.
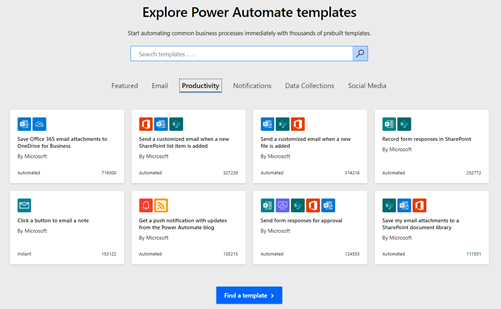
Power Automate can link all your current and favorite apps: Microsoft 365 Apps (Teams, Outlook, Excel, OneNote, OneDrive, SharePoint, etc.) and non-Microsoft products such as Google, Twitter, Facebook, Salesforce, Google Drive, Dropbox, Trello, Instagram, and Slack, to name a few.
You do not need any developer or IT skills to use Power Automate. Once you start automating your business processes, you will spend less time on manual, repetitive tasks like data entry.
The good news
Power Automate is part of the Microsoft Power Platform and is included in your Office 365 subscription (E3 or E5 licenses – “E” stands for Enterprise).
Power Automate is a cloud service available as a web version. To access this, you will need to log in to your Office 365 account via office.com. Once you reach the Office 365 Portal, select Power Automate from the list of apps. You can download the app on your smartphone/tablet or download the desktop app to test the trial version for 90 days. Beyond that, you will need to upgrade to a premium account.
The bad news
Your IT Dept may have blocked it.
How Does Power Automate Work?
Power Automate workflows (“flows”) are based on triggers and actions.
- A trigger starts the flow (e.g., Receiving an email from a key project stakeholder).
- An action is what happens once the flow is triggered (e.g., Creating a task when that email is received).
A flow can have one or more actions.
The five main types of Power Automate flows:
1. Automated cloud flows
For example, a flow triggered by a designated event: send an email if an item in a SharePoint list is changed.
2. Instant cloud flows
Allow users to manually trigger a flow from their mobile phone or desktop app with a button click. For example, quickly send a reminder email to your team before a meeting.
3. Scheduled cloud flows
Performs one or more tasks at certain times.
4. Business process flows
Are based on a defined set of actions.
5. Desktop flows (previously UI flows)
They are used to record clicks and keystrokes and automate tasks’ execution.
Both business process flows and desktop flows require a premium account and additional licenses to use them. They are more applicable for advanced users.

Creating a Cloud Flow
Let’s create a simple automated cloud flow using the template “Save Office 365 email attachments to OneDrive for Business.”
On the left-hand side of your Power Automate homepage, click on the “Templates” menu > then click on the selected template.
When you click it, what you will see is that any email that you receive in Outlook 365 mailbox and that has an attachment will automatically be saved in your OneDrive for Business:
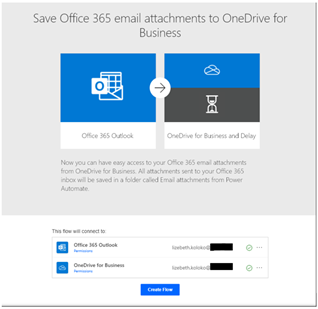
Make sure that the flow is connected to your Office 365 Outlook & OneDrive for Business accounts. The green checkmark next to your account name in the picture indicates that it’s a good connection. If you need to connect to another account, click on the three ellipses and select “+Add new connection.” Click on “Create Flow.”
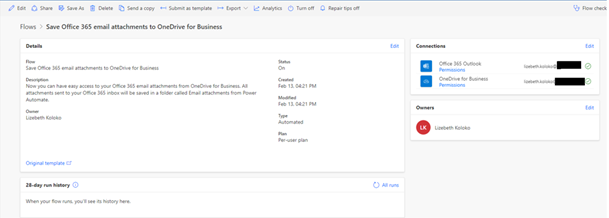
The flow is created, as you can see in the details from the picture below. I can send myself an email to test out this flow:
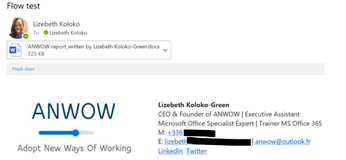
In Outlook, I created a new message titled “Flow test,” added an attachment, and sent the email.
When I go to my OneDrive account, I can see a new folder: “Email attachments from Power Automate.”

And it saved my email attachment in that folder:

From this point forward, any attachments I receive in an email will be saved in that folder.
This is just one example. I have created several flows to automate my repetitive manual tasks, and I use the below template flows regularly:
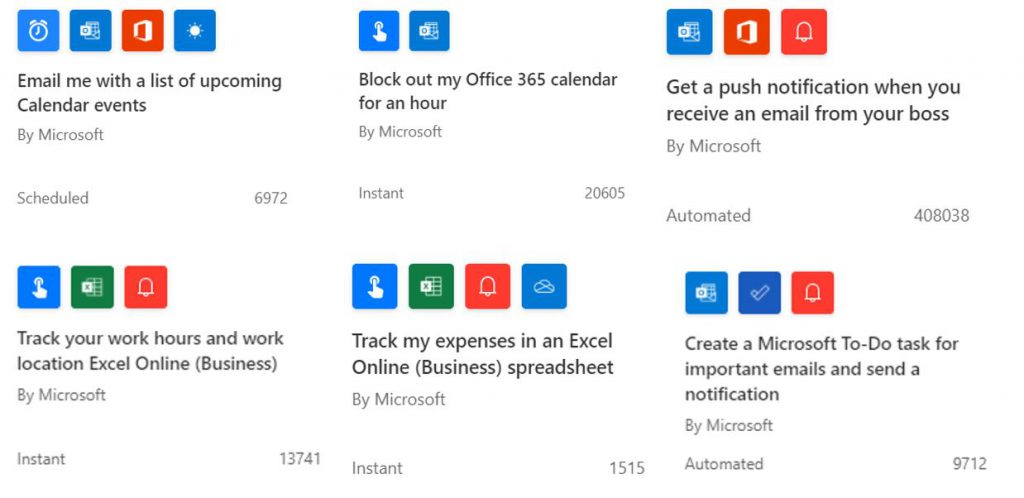
These are just a few examples. They are so many more scenarios in which you can use with Power Automate. Do not hesitate to contact me if you require assistance in creating your workflows and share your experiences. We can all learn from one another.
Helpful resources
Microsoft Power Automate documentation
Create automated workflows with Microsoft Power Automate


