
Using ‘Styles’ is a great way to apply lots of formatting styles consistently to spreadsheets, explains Traci Williams
We all have our own unique style, and we also stamp our own ‘style’ onto our spreadsheets. It may just be colours or the use of bold font, or even using underlining, but we can usually tell who has created a spreadsheet just by its style or formatting.
Excel has some built-in functions to help us with styles too. They’re not very commonly used, but can save loads of time, so let’s explore them.
Here is our data, containing lots of formatting:
Row 2, with the headings, includes the following formatting:
- Bold font
- Font size 12
- Text centred (horizontal & vertical)
- Wrap text
- Borders
- Fill colour (blue)
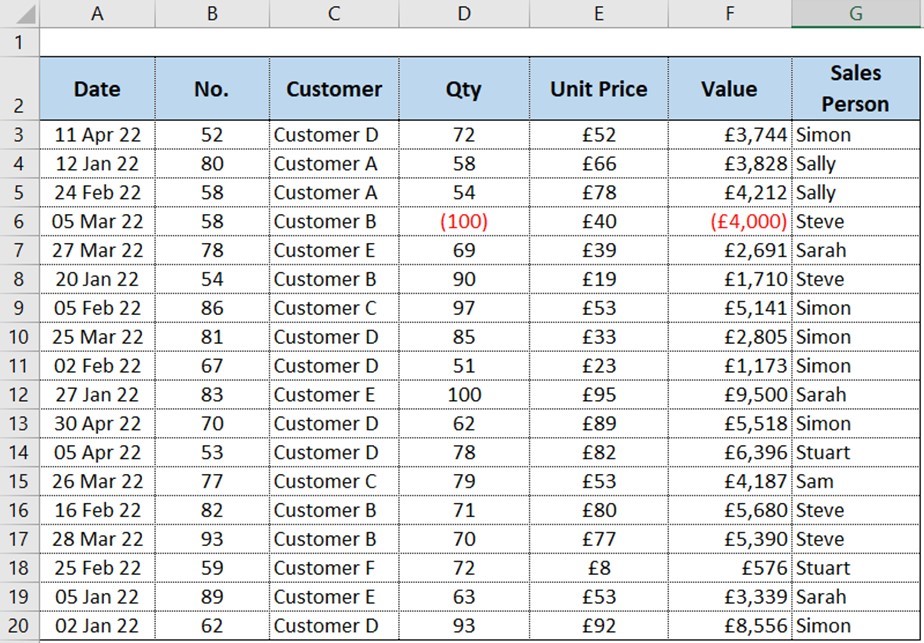
Of course, we can apply each of these formatting options manually, but this becomes time-consuming if we have to apply this formatting repeatedly.
Excel has a function called Styles, which includes several predefined styles, and we can also create our own. The styles include several formatting options, such as those in the list above, that can all be applied at once.
Using a Predefined Style
Styles can be found on the ‘Home’ ribbon, in the Style section:

The selection of predefined styles can be expanded by clicking on the arrow symbol to the right of this section:
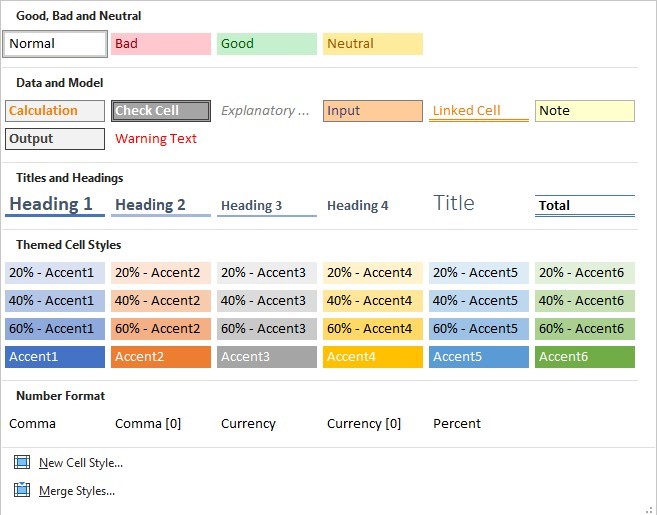
The descriptions of all the above options are just guides as to how the styles could be applied.
To apply a style, select the cells to apply them to, and then left click (once) on the relevant style:
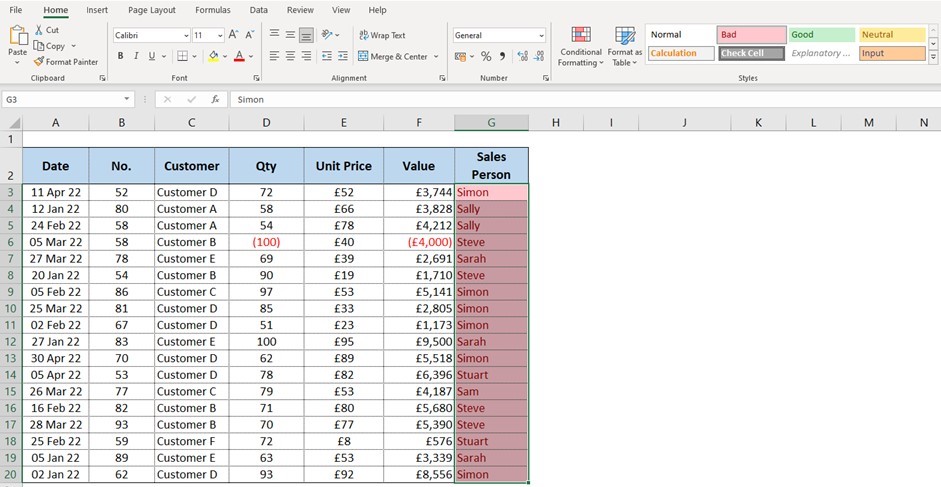
In the image above, the style named ‘Bad’ has been applied to column G.
This has changed the colour of both the font and the background fill at the same time.
Creating Styles
If none of the predefined styles matches what you need, then you can create your own style.
If you have already applied the format to cells, as in Row 2 of the above sheet, then this can be used to create the style:
Select one cell containing the relevant style; expand the ‘Style’ menu and select ‘New Cell Style’ (at the bottom). You will see this screen appear:
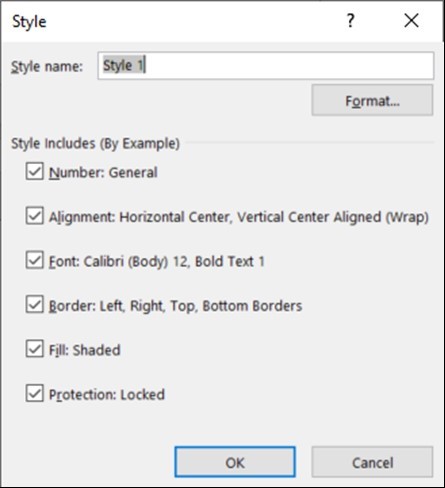
The ‘Style Name’ can be edited to something that represents the purpose (or use) of the style. I’d name this one ‘Headers.’
The sections below indicate the currently selected formatting options.
To make any changes to this style, click on ‘Format’ and make any edits using the usual ‘Format cells’ menu.
Once all changes have been made, click ‘OK’ to save them.
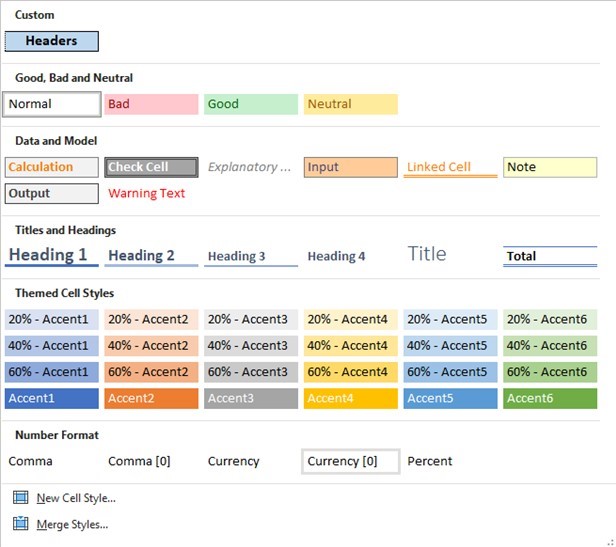
You will notice the new style has been saved and is visible in the ‘Custom’ section of the Styles menu, making it easier to find and reapply:
If you hadn’t already applied all the formats to a cell, you would expand the ‘Style’ menu and select ‘New Cell Style’ (as above), then edit the name and select the formatting manually.
Of course, once all changes have been made, click ‘OK’ to save them.
Each unique style can have as much or as little formatting as needed; there are no limitations. There are also no limits on how many styles can be created, but obviously, be mindful not to create too many, as it could become difficult to identify the correct one.
Once the styles have been created, they can be applied to cells as described above.
Editing Styles
Styles can be edited after they’ve been created, too, so you don’t need to worry if you change your mind.
Right click on the relevant style (from the Style menu), then select ‘Modify.’ This will open up the relevant ‘Style’ screen:
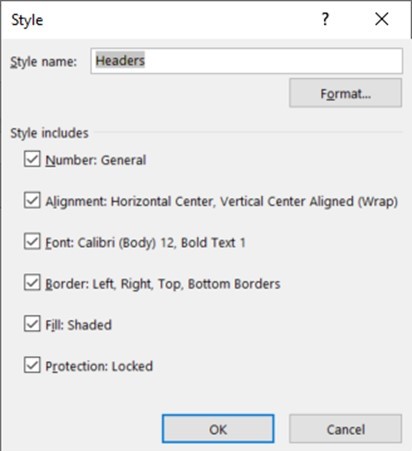
From here, you can edit the name, or click on ‘Format’ to amend any of the formatting options. Then click ‘OK’ and this will overwrite the style in the ‘Custom’ menu.
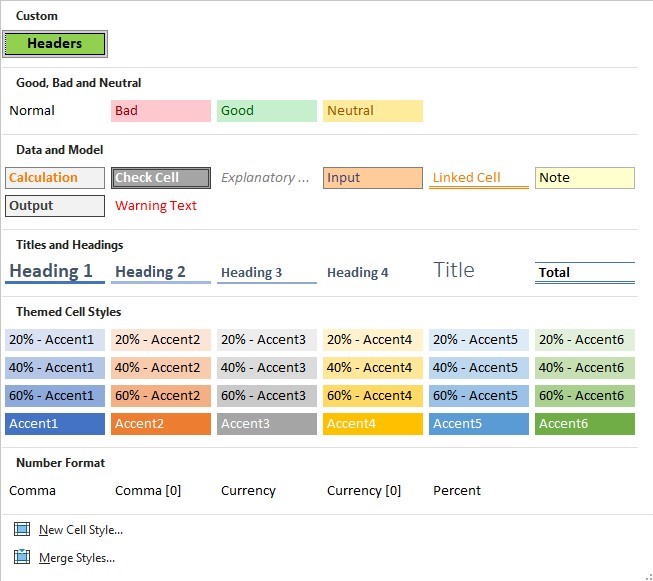
In this example, I changed the fill colour to green, and it now appears as follows:
When you right click on the style name, you also get the options of ‘Duplicate’ and ‘Delete.’
‘Duplicate’ will obviously make a copy of the style, which you can then edit. This is great if you want all the same formatting but a different colour font, as it saves you from having to reapply or select all the formatting.
‘Delete’ will remove the style completely, so it cannot be reapplied in future. This will not unapply the formatting from any cells; it just deletes the style from the ‘Custom’ menu.
Advantages and Limitations
Using Styles is a great way to apply lots of formatting styles consistently to spreadsheets. It is quick and easy to use. It also makes it super simple for people who are not very experienced or confident in Excel to still be able to apply gorgeous formatting.
Styles are also a much quicker way to apply ‘Custom Formats,’ as this can be cumbersome.
The only drawback of Styles is that they exist in individual spreadsheets, so if you create your own beautiful suite of styles, they will ONLY be available within the current file you’re working on. Sadly, when you open another file, the styles will not be available there.
To overcome this, you can ‘Copy’ a sheet from your file containing the styles into a sheet without them, and the styles will be copied in too. Once the styles have been copied in, the sheet can then be deleted.
Or you can save a file (containing the styles) as a template and always use this template as a starting point for your Excel files. This is a little cumbersome, but if you have complex styles, this could be worthwhile.


